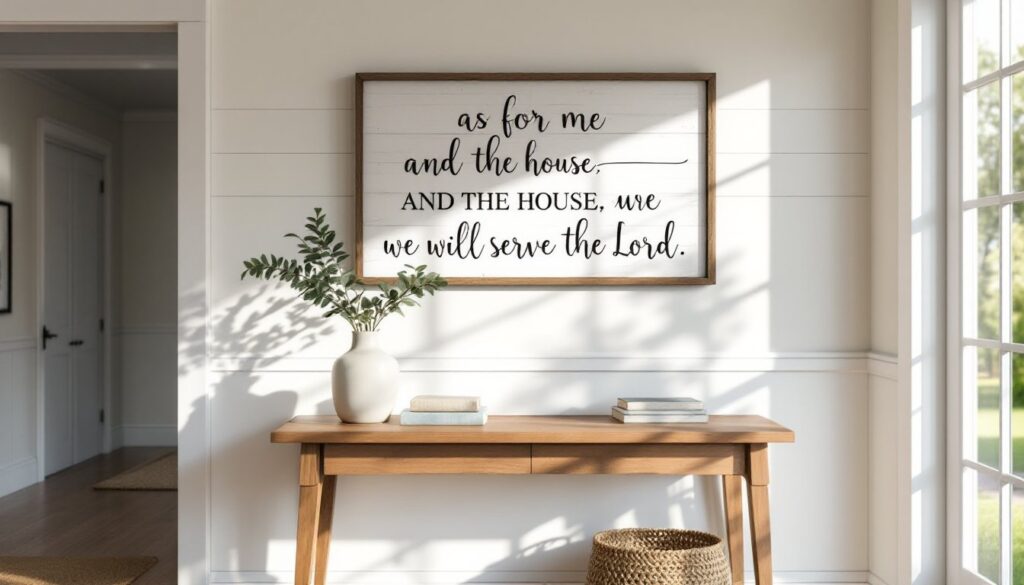
Faith-based wall decor has surged in popularity over the last decade, and “As for me and my house, we will serve the Lord” remains one of the most requested phrases. Taken from Joshua 24:15, it’s a declaration that turns a wall into a statement of values. Whether someone’s working on a full room makeover or just want to add a meaningful focal point above the mantel, this piece of decor carries weight beyond aesthetics. The good news? There’s a version for nearly every design style, from weathered barnwood to sleek metal, and it’s one of the easier DIY projects if someone wants to skip the store-bought route.
Table of Contents
ToggleKey Takeaways
- “As for me and my house” wall decor originates from Joshua 24:15 and serves as a meaningful mission statement that reinforces family values and faith in your home’s daily environment.
- This scripture phrase works across multiple design styles—from rustic farmwood signs to sleek metal and modern canvas—making it versatile for entryways, living rooms, kitchens, and bedrooms.
- A custom DIY wood sign takes 3–4 hours to build for $25–$50, using basic tools and materials like pine boards, wood glue, sandpaper, and stenciled lettering with acrylic paint.
- Proper placement and mounting are critical: hang at eye level (57″–60″ from the floor), anchor heavy signs to wall studs with toggle bolts, and leave 6″–12″ clearance between large pieces and furniture.
- Canvas, metal, and acrylic alternatives offer lightweight, modern options, though wood signs provide superior tactile presence and durability in high-traffic areas like entryways and living rooms.
Understanding the Meaning Behind “As for Me and My House”
The phrase originates from Joshua 24:15, where Joshua challenges the Israelites to choose whom they’ll serve. His reply, “as for me and my house, we will serve the Lord”, is a personal commitment that resonates across generations. It’s not a passive decoration: it’s a mission statement.
Many homeowners place this scripture in entryways, living rooms, or above kitchen tables as a daily reminder of household priorities. It sets tone for the home and often sparks conversation with visitors. For families raising kids, it reinforces faith values in a visible, consistent way.
While the phrase is rooted in Christian tradition, the decor itself has been adapted into countless styles, some overtly religious with crosses or doves, others stripped down to simple typography. The choice depends on how someone wants to integrate faith into their overall design scheme. Either way, the message stays consistent.
Popular Styles and Materials for This Wall Decor
Choosing the right material and style is half the project. The phrase works across nearly every interior design trend, so the key is matching it to the room’s existing finishes and color palette.
Wood Signs and Rustic Farmhouse Designs
Reclaimed wood and distressed finishes dominate this category. Think wide planks (often 1×6 or 1×8 pine), stained or painted with a rough texture, and hand-lettered or stenciled text. These signs typically measure between 24″–48″ wide and 10″–18″ tall, though custom sizes are common.
Construction is straightforward: boards are edge-glued or screwed to cross-supports (furring strips work well), then sanded and finished. Lettering can be painted on using a stencil and acrylic paint, or routed shallow with a CNC or handheld router if someone has the tools. For a more textured look, vinyl cut letters applied as a reverse stencil before a topcoat creates subtle contrast.
These signs pair well with shiplap, exposed beams, and neutral color schemes. They’re lightweight enough to hang with two sawtooth hangers or keyhole slots on the back. For larger pieces over 36″, add a center support to prevent bowing.
One pro tip: let the wood acclimate to indoor humidity for 48–72 hours before assembly. Skipping this step invites warping, especially with wider boards.
Metal, Canvas, and Modern Alternatives
Metal signs offer a cleaner, more contemporary take. Laser-cut or plasma-cut steel and aluminum hold up indoors and out. Powder-coated finishes in matte black, brushed bronze, or raw steel bring an industrial edge that works in modern farmhouse or minimalist spaces. Thickness typically runs 14–18 gauge (the lower the number, the thicker the metal). Mounting requires pre-drilled holes and toggle bolts or wall anchors rated for the weight, most metal signs in this size range weigh 3–8 pounds.
Canvas prints are the budget-friendly route. Stretched over 1.5″ deep frames, these can be ordered custom or DIYed with a Cricut and heat-transfer vinyl on blank canvas. They’re lighter than wood (usually under 2 pounds for a 24×18 piece) and hang with a single nail or adhesive strip. The downside? Canvas lacks the tactile presence of wood or metal and can look flat in rooms with heavy texture.
Other materials gaining traction include acrylic with standoffs (gives a floating effect), engraved slate, and even 3D wood cutouts mounted on contrasting backgrounds. When choosing styles beyond traditional wood, homeowners often lean toward modern decor elements that balance statement pieces with clean lines.
Where to Place Your “As for Me and My House” Decor
Placement matters as much as the piece itself. This isn’t just about filling a blank wall, it’s about anchoring a room’s purpose.
Entryways and foyers are the most popular spot. The phrase greets everyone who walks in, setting expectations right at the threshold. Hang it at eye level (center of the sign at 57″–60″ from the floor), typically above a console table or bench. If the entry is narrow, opt for a vertical orientation or a smaller sign to avoid crowding.
Living rooms benefit from large-scale versions mounted above the sofa or fireplace mantel. For above-couch placement, leave 6″–12″ of space between the furniture and the bottom edge of the sign. The piece should span two-thirds to three-quarters the width of the sofa for visual balance.
Kitchens and dining areas work well for mid-sized signs, especially above a farmhouse table or open shelving. Just keep it away from direct cooking zones, grease and steam will damage finishes over time. If mounting near a range, stick to metal or sealed wood.
Bedrooms call for more personal scale. A smaller sign (18″–24″ wide) above the bed or on a dresser wall keeps the message present without overwhelming the space.
Avoid placing heavy signs on drywall without proper anchoring. For pieces over 5 pounds, locate studs with a stud finder and use wood screws (2.5″–3″ #8 screws work for most applications). If studs don’t align, use toggle bolts rated for 50+ pounds per anchor. For room layout inspiration and spatial planning, some homeowners sketch out placements before committing holes to walls.
DIY Tutorial: Making Your Own Custom Wall Sign
Building a custom wood sign from scratch takes about 3–4 hours (not counting stain or paint dry time) and costs roughly $25–$50 depending on lumber choice and finish.
Materials:
- Three or four 1×6 or 1×8 pine boards, cut to desired length (24″–48″ is standard)
- Two 1×2 furring strips for backing support
- Wood glue
- 1.25″ wood screws
- Sandpaper (80, 120, and 220 grit)
- Stain or paint (acrylic works best for lettering)
- Polyurethane or wax topcoat
- Vinyl stencil or printed template for lettering
- Two sawtooth hangers
Tools:
- Circular saw or miter saw (miter saw gives cleaner cuts)
- Drill/driver with countersink bit
- Orbital sander (optional but saves time)
- Paintbrushes or foam roller
- Measuring tape and carpenter’s square
Steps:
- Cut boards to length. Use a miter saw for square, splinter-free ends. For a 36″ sign, cut three 1×6 boards to 36″ each.
- Arrange boards face-down. Align edges tight (don’t worry about small gaps, they add character). Lay furring strips across the back, about 4″–6″ from each end, perpendicular to the boards.
- Attach supports. Apply wood glue to the furring strips. Drill pilot holes to prevent splitting, then drive 1.25″ screws through the strips into each board. Use at least two screws per board per strip.
- Sand the face. Flip the sign over and sand progressively with 80, 120, then 220 grit. Wipe clean with a damp cloth.
- Apply base finish. Stain for a natural look, or paint a solid color (white, gray, or charcoal are common). Let dry per manufacturer’s instructions, usually 2–4 hours for paint, 6–8 hours for oil-based stain.
- Add lettering. Apply a vinyl stencil (cut with a Cricut or ordered online) and paint over it with contrasting color. Acrylic craft paint works fine: use a foam pouncer to avoid bleeding under the stencil. Remove stencil while paint is still slightly wet.
- Seal the piece. Once lettering is dry (1–2 hours), apply one or two coats of water-based polyurethane or furniture wax. This protects against fingerprints and light moisture.
- Install hangers. Screw sawtooth hangers into the top edge of each furring strip, about 6″–8″ apart. For heavier signs, use D-rings and picture wire instead.
Safety notes: Wear eye protection when cutting and sanding. Use a dust mask during sanding, pine dust is an irritant. Work in a ventilated area when applying stain or poly.
If someone’s new to lettering, practice the stencil technique on scrap wood first. Bleed-through is the most common mistake and ruins an otherwise clean sign. For folks looking to expand beyond scripture phrases, DIY decor tutorials offer step-by-step guidance on similar projects like pallet signs and farmhouse art.
Conclusion
“As for me and my house” decor isn’t just trendy, it’s a functional reminder that doubles as a design anchor. Whether someone picks up a ready-made metal sign, commissions a custom piece, or spends a weekend in the garage with pine boards and paint, the result is the same: a home that wears its values on the wall. Measure twice, mount it right, and it’ll outlast most design fads.