A 14×32 tiny house delivers 448 square feet of living space, enough for a full kitchen, bathroom, sleeping loft, and living area without the bulk of a traditional home. This footprint fits on most single-axle or tandem-axle trailers, making it transportable in many states without special permits. It’s also small enough to qualify as an accessory dwelling unit (ADU) in jurisdictions with relaxed square-footage minimums. Whether someone’s building a backyard guest house, a mortgage-free primary residence, or a vacation retreat, the 14×32 layout strikes a practical balance between livability and cost. This guide walks through design strategies, floor plan options, budgeting, permitting, and the choice between DIY and professional construction.
Table of Contents
ToggleKey Takeaways
- A 14×32 tiny house plans design delivers 448 square feet with full kitchen, bathroom, and sleeping loft, striking a practical balance between livability and affordability.
- Smart design strategies—including vertical ceiling heights, shared wet walls for plumbing, and loft placement—can make a 14×32 space live like 600 square feet.
- Budget $30,000–$70,000 for a DIY build or $70,000–$120,000 with professional contractors, with the largest costs in framing, roofing, plumbing, and electrical systems.
- Zoning and permitting vary significantly by location; verify local ADU rules, setback requirements, and whether your 14×32 qualifies as an accessory dwelling unit before purchasing land.
- DIY builders can save 30–50% on labor by handling framing, interior finishes, and basic plumbing runs, but should hire licensed professionals for HVAC, final electrical inspections, and structural engineering.
Why Choose a 14×32 Tiny House Layout?
The 14×32 dimension aligns with standard trailer widths (most road-legal trailers max out at 8.5 feet wide, but a 14-foot width suits foundation builds or oversized-load transport). At 448 square feet, it exceeds the cramped feel of micro-homes under 300 square feet while staying below the 500-square-foot threshold many zoning codes use to define “tiny.”
Key advantages:
- Simplified permitting: Many counties treat structures under 500 square feet as accessory buildings, which may bypass full residential code reviews. Always verify local rules.
- Material efficiency: A 32-foot length uses standard lumber dimensions with minimal waste. Joists, rafters, and wall studs cut cleanly from 8-, 12-, or 16-foot stock.
- Trailer compatibility: A 32-foot gooseneck or deck-over trailer accommodates this footprint. For foundation builds, a 14×32 slab or pier-and-beam system is straightforward.
- Resale and mobility: This size appeals to tiny-house buyers and short-term rental operators. It’s large enough to feel like a real home but small enough to relocate if needed.
The layout supports one or two occupants comfortably. Families with young children can make it work short-term, but most builders target couples, solo dwellers, or retirees downsizing from larger homes.
Essential Design Considerations for 14×32 Floor Plans
Tiny-house design hinges on vertical space, traffic flow, and multipurpose furniture. A poorly planned 448 square feet feels cramped: a thoughtful layout lives like 600.
Ceiling height matters. Standard 8-foot ceilings work, but 9- or 10-foot ceilings with a sleeping loft above the bathroom or kitchen recover lost square footage. Check trailer height limits (13.5 feet in most states) or residential code minimums (IRC requires 7 feet in habitable rooms, 6 feet 8 inches in bathrooms).
Wall thickness eats space. A 2×4 stud wall with drywall and exterior sheathing consumes roughly 4.5 inches per side. Upgraded insulation, spray foam or rigid foam board, improves thermal performance without expanding wall depth. Many small space living ideas emphasize slim-profile fixtures and built-ins to preserve floor area.
Window placement drives natural light and ventilation. Plan for at least two egress windows (IRC-compliant: 5.7 square feet of opening, 24-inch height, 20-inch width, sill max 44 inches above floor) if the home will be owner-occupied. Skylights or clerestory windows add headroom-friendly light.
Plumbing and electrical cores: Cluster the bathroom and kitchen along one wall to share a wet wall (a 2×6 stud bay houses supply and drain lines without boxing out extra space). Running PEX and romex through a shared chase cuts material cost and simplifies rough-in inspections.
Maximizing Space With Smart Room Layouts
Open-plan living/kitchen/dining is standard. A galley kitchen along one 14-foot wall leaves the opposite side for a fold-down table or loveseat. Upper cabinets and ceiling-mounted pot racks free up counter space.
Sleeping loft vs. main-floor bedroom: A loft over the bathroom (typically 6–7 feet wide, 8–10 feet deep) suits younger occupants comfortable with ladder access. Main-floor bedrooms sacrifice living area but improve accessibility for anyone with mobility limits.
Bathroom size: A 3×6-foot or 4×6-foot wet bath (shower, toilet, vanity) meets code minimums. Corner showers (32×32 neo-angle units) or tub-shower combos (60×30 standard alcove) fit most plans. Composting toilets and tankless water heaters save space but require user buy-in on maintenance.
Storage solutions: Built-in benches with lift-top compartments, under-stair drawers, and wall-mounted shelving turn dead zones into usable volume. Avoid freestanding furniture that blocks sight lines.
Popular 14×32 Tiny House Floor Plan Styles
Single-loft layouts place one sleeping loft above the bathroom. The main floor holds an open kitchen/living area and a full bath. This design suits solo dwellers or couples who don’t need separate sleeping zones.
Double-loft layouts add a second loft above the living area, creating two private sleeping spaces. Useful for roommates, small families, or rental income scenarios. Ladder or stair access to each loft consumes floor space, so plan traffic flow carefully.
Main-floor bedroom plans dedicate 8–10 feet of length to a ground-level bedroom with a standard door. The remaining 22–24 feet accommodates kitchen, bath, and living. This style appeals to older adults or anyone avoiding ladders. It reduces ceiling height options (no loft means less vertical recovery).
Studio-style open layouts skip internal walls entirely, using furniture, rugs, or partial-height dividers to define zones. Maximizes perceived space but sacrifices acoustic privacy. Works best for single occupants or couples with aligned schedules.
Gooseneck designs (for trailer builds) extend the living area over the tow vehicle’s bed, adding 4–6 feet of floor space, often used for a main-floor bedroom or office nook. Requires a compatible truck and increases overall transport height.
Many builders adapt DIY tiny house plans with free material lists and cut diagrams, then modify room sizes or door swings to match personal needs.
Building Costs and Budget Planning for Your 14×32 Tiny House
Expect $30,000–$70,000 for a DIY build, $70,000–$120,000 if hiring contractors. Costs vary by region, material grade, and finish level.
Shell and structure (framing, sheathing, roofing, windows, exterior doors): ~$12,000–$20,000. Use pressure-treated 2×6 or 2×8 floor joists on 16-inch centers for trailer builds: engineered I-joists or dimensional lumber for foundation builds. Metal roofing (26- or 29-gauge steel) runs $2–$4 per square foot installed and lasts 40+ years. Asphalt shingles cost half that but require replacement in 15–20 years.
Insulation and drywall: ~$3,000–$6,000. Closed-cell spray foam (R-6 to R-7 per inch) is pricier upfront but seals air leaks. Fiberglass batts (R-13 in 2×4 walls, R-19 in 2×6) cost less but need meticulous vapor-barrier installation.
Plumbing and electrical: ~$5,000–$10,000 if DIY-capable with permit-ready rough-ins: add 50–100% if hiring licensed trades. Budget $800–$1,200 for a 50-gallon electric water heater or $1,000–$1,500 for a tankless unit. PEX supply lines simplify runs: SharkBite fittings speed up connections but cost more than crimped or clamped joints.
Kitchen and bath fixtures: ~$4,000–$10,000. IKEA or big-box cabinets (unfinished or ready-to-assemble) keep costs down. A 30-inch range, 18-cubic-foot refrigerator, and single-bowl sink fit most galley kitchens. Bathroom: $300–$600 for a fiberglass shower base and surround, $150–$400 for a toilet, $200–$600 for a vanity and faucet.
Finishes (flooring, paint, trim): ~$2,000–$5,000. Luxury vinyl plank (LVP) flooring costs $2–$5 per square foot, installs without glue, and handles moisture better than laminate. Budget one gallon of primer and one gallon of finish paint per 400 square feet of wall/ceiling area.
Trailer or foundation: A new 32-foot gooseneck trailer runs $6,000–$10,000. A concrete slab with vapor barrier and perimeter insulation costs $4–$8 per square foot (roughly $1,800–$3,600 for 448 square feet), plus excavation and gravel base.
Permit and inspection fees: $500–$2,000 depending on jurisdiction. Some counties charge per square foot: others have flat fees for accessory structures.
Permits, Zoning, and Legal Requirements
Zoning determines where you can place a tiny house. Check whether local codes allow:
- Accessory dwelling units (ADUs): Many municipalities permit detached ADUs on single-family lots if total lot coverage stays below 40–60%. Minimum setbacks (usually 5–10 feet from property lines) and owner-occupancy rules apply.
- RV or mobile-home parks: Some parks accept RVIA-certified tiny houses on wheels. Certification requires third-party inspection and compliance with ANSI A119.5 standards.
- Agricultural or rural zones: Counties with low-density zoning may allow tiny houses as farm worker housing or temporary dwellings. Confirm minimum square-footage requirements, some codes mandate 600+ square feet for primary residences.
Building permits are required for most foundation builds and any structure with plumbing/electrical. Submit stamped engineering plans if your jurisdiction requires them (common in high-wind or seismic zones). Inspections typically occur at footing, framing, rough-in (plumbing/electrical/HVAC), and final stages.
Trailer-mounted homes occupy a gray area. If titled as an RV, they may bypass residential building codes but face restrictions on long-term parking. If classified as a permanent dwelling, they need foundation anchoring and full code compliance.
Utilities: Off-grid systems (solar + battery, composting toilet, rainwater catchment) sidestep hookup fees but may not satisfy health department rules. Grid-tied builds need utility easements and meter installations, coordinate with local providers early.
Insurance: Standard homeowners policies may exclude structures under 500 square feet or mobile homes. Specialty tiny-house insurers cover liability and property damage: expect $400–$800 annually.
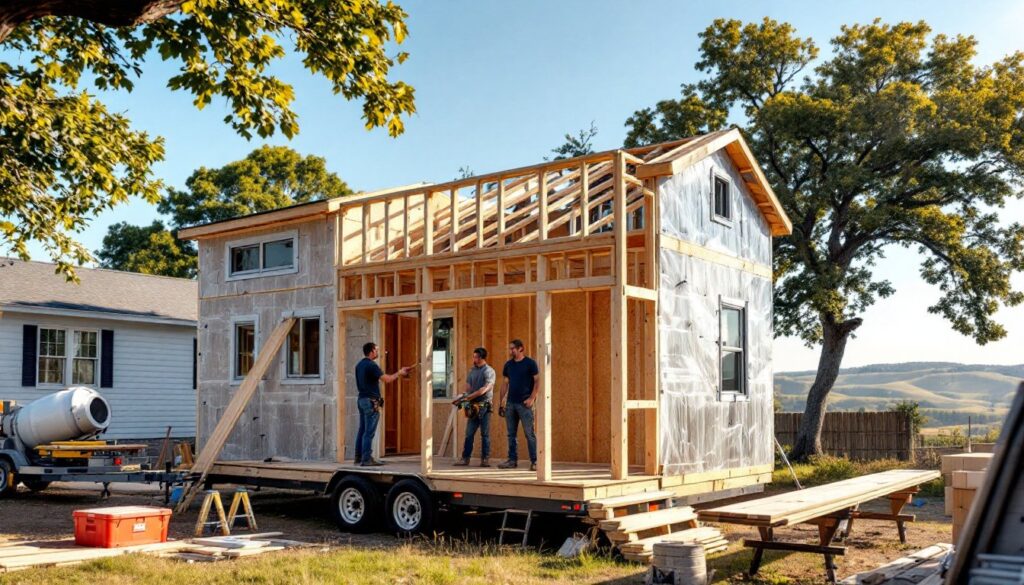
DIY vs. Professional Build: What You Need to Know
DIY builds save 30–50% on labor but demand time, tools, and skills. Framing, sheathing, and roofing are approachable for intermediate builders with a circular saw, drill, level, and framing square. A miter saw improves trim cuts: a pneumatic framing nailer speeds wall assembly.
What to DIY:
- Framing and sheathing (if comfortable reading plans and using a speed square)
- Interior finish work (drywall, painting, trim, flooring)
- Basic plumbing runs (PEX is forgiving: use crimp or clamp tools)
- Low-voltage electrical (if local code allows homeowner wiring under permit)
What to hire out:
- Structural engineering (if modifying typical tiny house construction methods or building in high-wind/seismic zones)
- HVAC sizing and installation (mini-split heat pumps require refrigerant handling and vacuum pumps)
- Final electrical and plumbing inspections (licensed contractors streamline sign-offs)
- Spray-foam insulation (requires specialized equipment and safety gear)
Tool investment: Expect $1,500–$3,000 for a starter kit (corded drill, circular saw, jigsaw, orbital sander, sawhorses, extension cords, basic hand tools). Rent expensive items like scaffolding, pneumatic nailers, or plate compactors.
Time commitment: A solo DIYer working weekends may need 6–12 months from foundation to move-in. A two-person team with construction experience can finish in 3–6 months. Professional builders complete turnkey projects in 8–16 weeks but charge for that speed.
Skill-building resources: Local community colleges often offer framing and electrical courses. YouTube channels and builder forums provide project-specific guidance, but verify techniques against IRC or IBC code references.
Permitting as owner-builder: Most jurisdictions allow homeowners to pull permits for their own primary residence. You’ll need to pass the same inspections as a licensed contractor, and some trades (gas line work, septic installation) still require licensed professionals.